We (Jason is a part of this now! haha) are trying to finish enclosing the backyard with fencing. Enjoy our efforts:
First, a disclaimer video:
So here is how I set my post:
 First you need to dig a whole that is three times the width of your posts. Since I was using 4x4 posts, I dug the hole 12 inches wide. You should go deeper than the frost line for your area. Little Rock Arkansas building code lists the frost line at 15 inches. I dug my holes 18 inches for good measure.

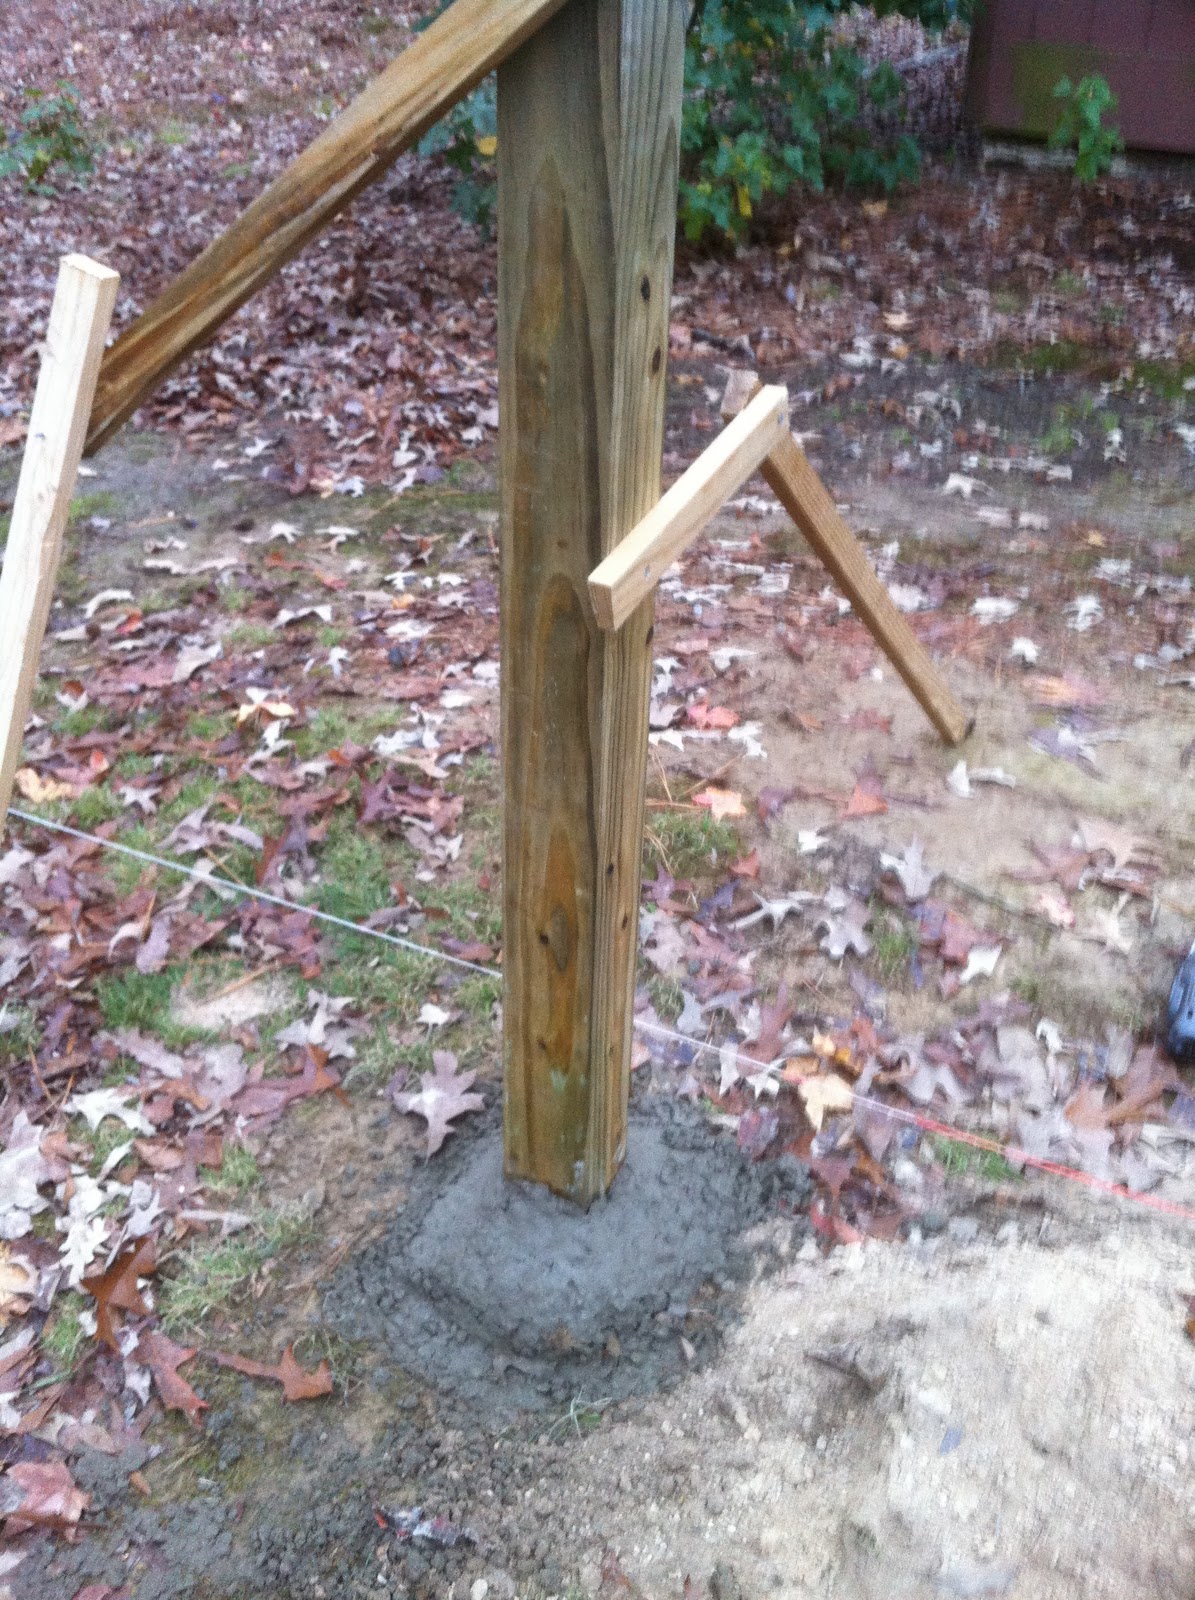
Next you need to position your post in the hole and ensure it is level. The easiest tool for doing this is a post level. See the yellow thing in the picture? Now, I have done posts using a standard level and it is a pain! Make it easy on yourself and get a post level. They are approximately $5 at Lowe's. You will need to brace the post so that it doesn't move while you are working with the concrete. I used the two stick method for my free standing post. Basically I took a 1x2 and sharpened one end. Then I attached a smaller 1x2 with a wood screw. I used a drill to torque the screw enough that it had some resistance but loose enough so that the second stick could still move.I hammered the pointed end into the ground and used a drill to screw the free arm into the post, making sure that everything was still level. I repeated this on the adjacent side of the post.
Now the fun part: Cooking with concrete!
Use a shovel to add your concerete to your hole. Be sure to pack it around and try to get any air voids out. You want to slope the concerete so that water will run down and away from your post instead of pooling next to the wood. Standing water could cause premaure post failure.
Leave the braces in place until the concrete has cured. Do not put any load on the post for at least 24 hours.
Once I get all of my posts set, I will do another tutorial on how to build the fence!
Remember, I am not an expert. But I do want to encourage everyone to get out and try to do something you have never done before. You might surprise yourself! :) Happy building!